
 Abdul Moeed
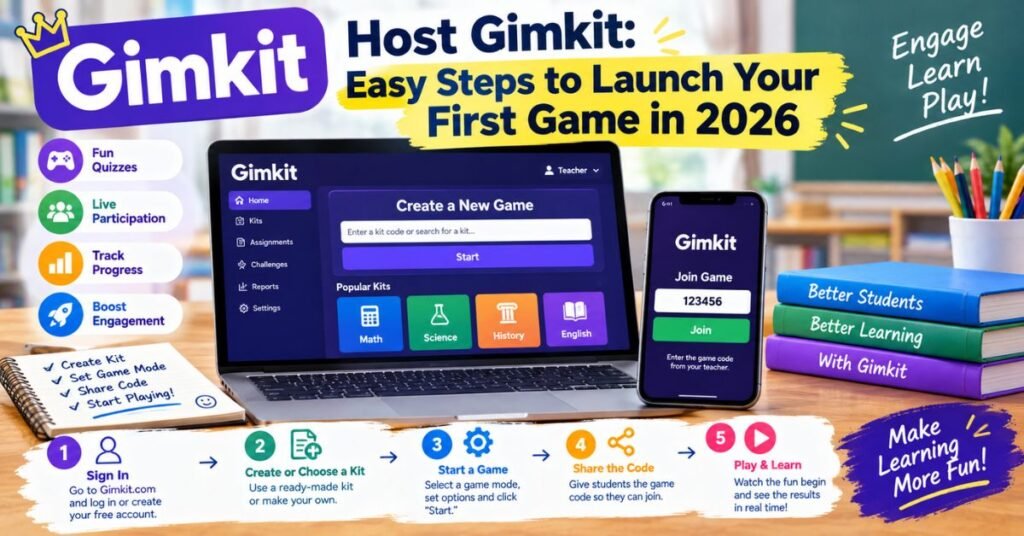
Want to turn a boring review session into something students actually enjoy? Learning how to host Gimkit can help any teacher turn dry practice questions into a fun, live classroom activity. Once you understand the basics, running a Gimkit live game becomes second nature.
This guide walks you through everything step by step. You will learn how to set up your Gimkit account, build your first Gimkit kits, launch a Gimkit classroom game, and read your results afterward. By the end, you will feel confident acting as a Gimkit game host for any class, anywhere in the world.
What Is a Host Gimkit?
A Gimkit host is the person running the game. Usually, that’s the teacher. The host picks the kit, chooses the game mode, adjusts the Gimkit settings, and watches over the session while it runs. You do not need any coding skills. You just need good questions and a bit of planning.
Read More: YonoChomp Com: Complete Guide to the Website, Safety & Legitimacy
Being a Gimkit teacher host is simple once you get the hang of it. You control the pace. You decide how competitive or relaxed the game feels. And in some modes, you can even join in as a player instead of just watching from the side. This flexibility makes Gimkit a strong tool for classroom engagement and gamified learning, no matter what subject you teach.
How to Create a Gimkit Account
Before you can host a Gimkit game, you need a Gimkit teacher account. Signing up is free. You can register using Google or a regular email address. During setup, make sure to choose the educator option, not the student one. This unlocks your Gimkit dashboard, where all your kits and classes live.
New educator accounts often get a short Pro trial before switching to the free Basic plan. This gives you time to explore extra features before deciding if you need them. Good news for students, too: a Gimkit student account is not required to play. Kids can join instantly using just a code, which makes Gimkit great for remote learning activities and quick, low-prep sessions.
How to Create Your First Gimkit Kit
A kit is simply your set of questions. Think of it as the heart of your Gimkit question sets. Before hosting, spend a little time making sure your questions match what you are teaching. Clear wording matters. Confusing questions can test reading skills instead of the actual subject.
Keep your first kit short. A small, focused kit is easier to manage than a huge one. Double-check every answer before you go live, since mistakes can confuse students mid-game. Once you build a kit, it stays saved in your account forever, so you can reuse it anytime for future Gimkit classroom activities. This makes Gimkit useful for question-based learning across many topics and grade levels.
How to Host a Live Gimkit Game
Now comes the fun part. Once your kit is ready, it’s time to actually start a Gimkit game. The process is broken into six easy steps, and each one takes just a minute or two.
Below, we will walk through the entire Gimkit hosting guide, from opening the host screen to watching your students play. Follow these steps closely if this is your first time hosting.
1. Open the Gimkit Host Screen
Log into your account and go to your dashboard. Find the kit you want to use. Click the Play Live button next to it. This takes you straight to the Gimkit host screen, where your hosting journey begins.
Take your time here. The mode you choose next will shape the entire game experience, so don’t rush. If this is your very first time hosting, keep things simple rather than picking a complicated option right away.
2. Choose a Game Mode
After reaching the host screen, you will land on the Mode Picker. This is where you choose a Gimkit game mode. Some modes focus on speed and competition. Others focus on teamwork or exploration. The options can change over time, so always check what’s currently available.
For first-time hosts, simple is best. Pick a mode your students can understand within a minute. If you find yourself explaining rules for five minutes straight, that mode is probably too complex for a first session. Save the fancier Gimkit game modes for later, once your class gets comfortable with the basics.
3. Configure Your Game Settings
Next, you will see the Gimkit game settings screen. Here, you can set a game goal, connect a class, allow late joining, or turn on the nickname generator. Some 2D modes also let you balance how much gameplay rewards depend on correct answers.
Think about your lesson before changing anything. A quick five-minute review works well with a time-based goal. A longer activity might need a different ending condition. Late joining usually stays on by default, which helps if students often arrive a bit late to class.
4. Get Your Gimkit Game Code
Once your settings are ready, you will move into the lobby. This is where your Gimkit game code appears. You can display it on a projector or share it as a direct link. There is also a QR code option, which appears when you hover over the code box.
The Gimkit join code connects your students to the session, so this step matters a lot. For in-person classes, showing the code on a screen usually works best. For remote teaching, sending the direct join link can save your students a few extra clicks.
Read More: DigitalRGS Everything Apple: Complete Guide to Apple Devices and Services in 2026
5. Share the Code With Students
Now it’s time to share Gimkit code with students. They simply go to the Gimkit join page, type in the code, and pick a nickname. If nicknames worry you, the built-in generator can assign safe, silly names automatically.
Before starting, glance through the lobby. Sometimes students get creative with nicknames, so it helps to catch anything inappropriate early. If your class is connected through the Classes feature, this whole process becomes even smoother and faster.
6. Start the Game
Once most students have joined, hit the green Start button. Give a quick reminder about following classroom rules and answering carefully. Then the Gimkit interactive quiz begins, and your students dive right in.
In 2D modes, you can choose to play alongside your class or simply watch from the host view. Either way, this is the moment all your prep work pays off. Watching your students race to answer questions is honestly one of the most satisfying parts of teaching with Gimkit.
Popular Gimkit Game Modes Explained

Gimkit offers a wide mix of modes, each built for a different kind of classroom energy. Some, like Snowbrawl, focus on fast-paced, competitive action. Others, like One Way Out, ask students to work together toward a shared goal. This variety makes Gimkit a flexible educational quiz platform for almost any teaching style.
Other modes bring their own twist. Don’t Look Down, for example, uses an obstacle-course setup where correct answers fuel your progress. Since modes get updated fairly often, it’s smart to check the Learn More details before planning a whole lesson around one specific mode. This keeps your Gimkit learning game experience fresh and relevant every time you play.
How to Manage a Gimkit Game as a Host
Once the game starts, your job shifts from setup to active supervision. You need to manage a live Gimkit game by watching the host screen closely. Keep an eye on participation, progress, and any technical hiccups that pop up along the way.
Good classroom management during a live game matters just as much as good question writing. If students seem more focused on gameplay tricks than actual learning, that’s a signal to adjust your settings next time. Balancing entertainment with student assessment keeps the game valuable, not just fun. A skilled host knows when to step back and when to jump in.
How to Review Gimkit Game Results
After the game ends, don’t just glance at the Gimkit leaderboard and move on. Take time to view Gimkit game results properly. Look closely at which questions tripped up your students the most. These patterns often reveal exactly what needs extra review or reteaching.
This step turns Gimkit into more than just entertainment. It becomes a genuine tool for formative assessment. When you review student performance after each session, you gather real insight into how well your class actually understood the material. Even free accounts get access to these detailed reports, so cost is never a barrier to good data.
Gimkit Basic vs. Pro: Which Plan Do You Need?
Most teachers find that the free plan covers everything they need. It includes hosting, class creation, and full Gimkit results reporting. Pro, on the other hand, adds extra features for teachers who want more customization and variety in their lessons.
Here’s a quick breakdown to help you decide which plan fits your classroom:
| Feature | Gimkit Basic | Gimkit Pro |
| Host live games | Yes | Yes |
| Create classes | Yes | Yes |
| Game reports | Yes | Yes |
| Exclusive game modes | No | Yes |
| Assignments feature | No | Yes |
| Audio questions | No | Yes |
| Image uploads in questions | No | Yes |
| Price | Free | Around $14.99/month or $59.88/year |
If you’re just starting out, Basic gives you everything needed to run a solid Gimkit classroom quiz. Pro becomes worth it once you want more variety, like audio-based questions or custom images inside your kits.
Tips for Hosting a Successful Gimkit Game
Start small. Pick a short kit built around a topic your students already know fairly well. Testing the game yourself beforehand helps you catch any mistakes before your class ever sees them. Keeping the join code visible throughout the session also saves you from answering the same question twenty times.
Avoid changing too many settings during your first few sessions. Stick to one mode, one clear goal, and minimal extra options. This keeps things simple while you build confidence as a host. Over time, as you get more comfortable, you can experiment with different online classroom games and settings to keep lessons fresh and exciting for your students.
Common Gimkit Hosting Problems and Solutions
Even experienced hosts run into small hiccups now and then. Students sometimes struggle to join because of a typo in the code or a weak internet connection. Double-checking the code before sharing it usually solves this quickly.
Large classes can occasionally cause lag, especially on slower school networks. Testing your connection beforehand helps avoid surprises mid-lesson. Inappropriate nicknames sometimes sneak into the lobby too, so a quick glance before starting catches most issues. If a chosen mode feels too complex for your group, simply switch to something simpler next time. These small fixes keep your live classroom activity running smoothly without major disruptions.
Frequently Asked Questions
Do Students Need Accounts to Join a Gimkit Game?
No, they don’t. Students can join instantly using just the game code, without creating or logging into any account.
How Many Students Can Join a Live Gimkit Game?
Gimkit currently allows up to 500 students in a single live game. That said, actual performance depends on internet reliability and device quality.
Can Students Join After a Gimkit Game Starts?
Yes, as long as the host keeps the late-join setting turned on. This option stays enabled by default, though hosts can disable it if needed.
What Devices Work With Gimkit?
Most internet-connected devices work fine. This includes laptops, Chromebooks, tablets, and many smartphones through a standard web browser.
What Is the Best Gimkit Mode for First-Time Hosts?
Choose a mode with simple, easy-to-explain rules. This lets you focus on question quality rather than teaching complicated game mechanics.
Can You Reuse Gimkit Kits?
Absolutely. Every kit you build stays saved in your account, ready to reuse for future Gimkit classroom activities whenever you need them.
How Do You End a Gimkit Game Early?
Host controls vary slightly by mode, but you’ll generally find an end-game option directly on your host screen during the live session.
Final Thoughts
Learning how to host Gimkit becomes much easier once you break it into small, manageable steps. Create your account, build a focused kit, choose a simple mode, configure your settings, share your code, and start the game. From there, your only job is keeping students engaged while using their answers to guide future lessons.
You don’t need Gimkit Pro to get started, either. The free Basic plan already covers hosting, reporting, and everything a typical classroom needs. With a well-prepared Gimkit kits and a simple first game, any teacher can confidently run interactive learning games and make review sessions genuinely enjoyable in 2026.