
 Abdul Moeed
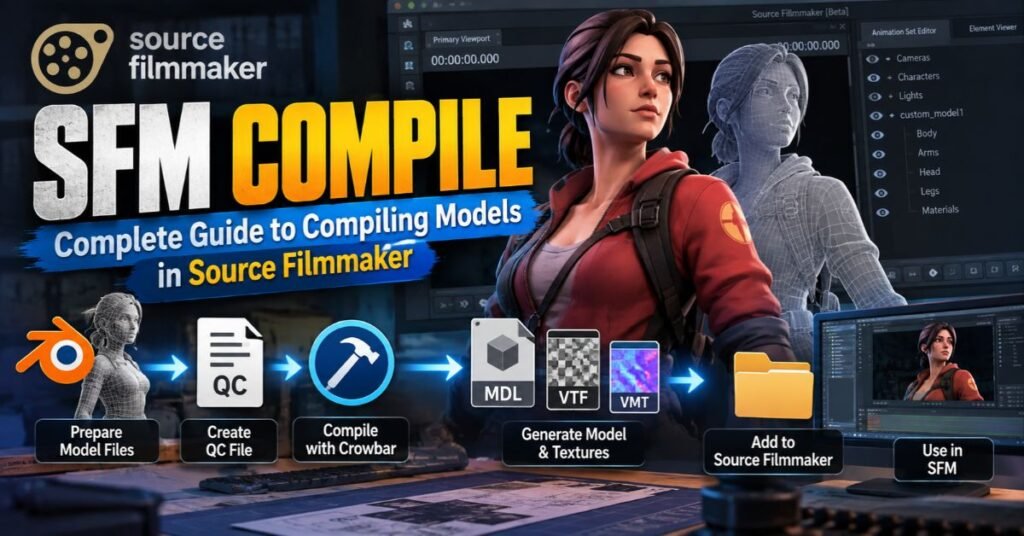
Custom content is what makes Source Filmmaker special. Anyone can use stock models, but a custom SFM model gives your scene a look nobody else has. To get there, you need to understand SFM compile. This guide walks you through the whole process, from raw files to a working model inside SFM.
What Is SFM Compile and How Does It Work?
SFM compile is the process of turning your 3D files into something Source Filmmaker can actually load. Think of it as translation. Your model starts as an SMD or DMX file. It ends as an MDL file, along with support files like VVD, VTX, and sometimes PHY. Nothing in between is optional. Skip a step, and the model won’t work.
The basic model conversion pipeline looks like this: your 3D model becomes an SMD or DMX file, then a QC file tells the compiler what to do with it, then StudioMDL does the actual model compilation, and finally the finished files land inside SFM. This is the same core process used across the Source engine, not just SFM. Once you understand this chain, everything else in this guide makes a lot more sense.
Why Is SFM Compile Important for Custom Models?
Without compiling, a model is just raw data. Source Filmmaker can’t read a Blender file or an FBX file directly. It needs the compiled Source engine model format. That’s the whole reason SFM model compilation exists. It bridges the gap between what you build in your 3D software and what actually shows up in your scene.
This matters even more once you start building custom character SFM projects. A character needs bones, weights, and sometimes facial flexes, not just a mesh. Every one of those pieces has to pass through the compiler correctly. Get it right, and you unlock full control over your Source Filmmaker models. Get it wrong, and you’ll be staring at a purple and black error texture, wondering what went wrong.
SFM Compile Workflow: From Model Files to Source Filmmaker
Here’s the full SFM compilation workflow in order. First you prepare your files. Then you export them. Then you write a QC file. Then you run the Crowbar compiler. Finally, you test the result inside SFM. Each step depends on the one before it, so skipping ahead usually causes problems later.
Some workflows get complicated fast, especially with rigged characters and facial animation. But the core steps stay the same whether you’re compiling a simple prop or a full character. Let’s break each stage down.
Preparing Model and Texture Assets
Before you touch the exporter, clean up your model. Check the scale. Check the UV layout. Make sure your model bones have sensible names. Messy files cause messy compiles, and fixing a bad export after the fact wastes far more time than fixing it beforehand.
Organize your model files into clear folders too. A confusing folder structure leads to broken model paths later, and that’s one of the most common causes of failed compiles.
Exporting Models in a Source-Compatible Format
Next comes model export. You’ll typically export as an SMD file or a DMX file, depending on your tool. Blender users often rely on Blender Source Tools for this step. This is the point where your reference mesh, your skeletal hierarchy, and your animation data all get turned into files the compiler can read.
If you’re building a character, export your reference mesh and your animation files separately. Keep names consistent. A mismatch between your mesh export and your QC file references is a very common failure point.
Creating the QC File for SFM
The QC file is the instruction manual for StudioMDL. It tells the compiler what your model is called, where to find its mesh, which materials to use, and what animations exist. Learning to create a QC file properly is one of the most important skills in this whole process.
Even a simple SFM QC file needs commands like $modelname, $body, and $cdmaterials. More advanced models add $sequence, $collisionmodel, and $bodygroup. Getting the syntax right here saves you from most future headaches.
Compiling Models with Crowbar and StudioMDL
Once your QC file is ready, it’s time to compile models with Crowbar. Crowbar is a graphical tool that runs StudioMDL for you, so you don’t need the command line. You load your QC, pick your game configuration, and hit compile.
The StudioMDL compiler does the real work here. It reads your QC file, gathers your mesh and texture data, and produces the final compiled model. Crowbar just makes the process easier to manage and easier to read when something goes wrong.
Testing the Compiled Model in SFM
After the compile finishes, don’t assume everything worked. Test compiled models before moving forward. Load the model in SFM or in a model viewer. Check that it appears correctly, poses correctly, and shows its textures properly.
This step catches problems early. It’s much easier to fix one small issue right after compiling than to discover five stacked problems later in a finished scene.
How to Prepare Files for SFM Compilation

Good preparation saves hours of frustration. Before you export anything, think about how you’ll prepare model files and where they’ll live. A clean, consistent setup makes every later step easier, and it makes troubleshooting far less painful when something breaks.
This section covers the three file types you need to organize: your model files, your texture files, and your overall folder setup. Each one plays a specific role in a successful SFM model compilation.
Model, Mesh, and Reference Files
Your reference mesh is the visible model. If you’re building a character, you’ll also need animation files and possibly a physics mesh. Keep these separate but organized under one project folder. Confusing file names cause confusing errors, so keep it simple.
A typical setup might include a body mesh file, one or more animation files, and a collision mesh if needed. Naming them clearly, like body.smd or idle.smd, makes your QC file much easier to write and read later.
Texture and Material Files
Textures follow their own path. Source uses VTF textures for images and VMT materials to define how those textures behave in the engine. Every model needs both pieces working together, not just one or the other.
Your SFM material files should sit in a matching folder structure under your materials directory. If the folder structure doesn’t match what your QC file expects, SFM won’t be able to find the texture, and you’ll get the dreaded missing-texture look.
Folder Structure and SFM Directory Setup
Your SFM directory setup matters more than people expect. Keep your model files under a models folder and your material files under a materials folder, mirroring the same subfolder names. This keeps your model and texture paths lined up correctly.
Here’s a simple example structure:
| File Type | Example Path |
| Reference mesh | models/mycharacter/body.smd |
| Animation file | models/mycharacter/idle.smd |
| Compiled model | models/mycharacter/mycharacter.mdl |
| Material definition | materials/models/mycharacter/body.vmt |
| Texture file | materials/models/mycharacter/body.vtf |
Stick to lowercase names, avoid spaces, and keep your structure consistent across every project. This single habit prevents a huge share of compile errors.
How to Create a QC File for SFM Compile
Learning how to create a QC file is the heart of any SFM compile. This small text file controls everything the compiler does. Get comfortable with its syntax, and you’ll be able to build almost any kind of custom model.
Most beginners find the QC file intimidating at first, but it follows a simple logic. Each line tells StudioMDL one specific thing: where to find a file, what to name something, or how to treat a body part. Once you see a few working examples, the pattern becomes clear fast.
Essential QC Commands for a Custom Model
Every SFM QC file relies on a small set of core commands. Here are the most common ones:
| QC Command | Purpose |
| $modelname | Sets the model’s name and output path |
| $body | Defines the model’s mesh |
| $bodygroup | Groups swappable mesh parts |
| $cdmaterials | Points to the material folder |
| $sequence | Defines an animation |
| $collisionmodel | Sets up physics collision |
| $surfaceprop | Defines surface material behavior |
| $staticprop | Marks a model as a static prop |
Learning QC scripting doesn’t require memorizing every command. Start with the basics, then add more as your models get more complex.
Model Paths, Materials, Bones, and Sequences
Your QC file ties together mesh files, material paths, and animation sequences into one cohesive package. The $cdmaterials line tells StudioMDL where to look for materials, while $sequence lines define each animation your model uses.
For characters, bone names matter just as much as file paths. Your skeletal hierarchy in your 3D software has to match what your animation files expect. If a bone name changes between your reference mesh and your animation export, the compile might succeed, but the animation will look broken.
Common QC File Mistakes to Avoid
Small mistakes cause big problems here. A misspelled file name, a missing folder, or an extra character can break the whole compile. The $include command, used for shared QC content, is another spot where path errors sneak in.
One well-known example involved a flex controller name that included a dash. The compiler read the dash as a math operation instead of part of the name, and threw an unknown-controller error. It’s a small thing, but it shows how literal QC syntax really is.
How to Compile an SFM Model Using Crowbar

Crowbar remains the go-to tool for anyone learning to compile a model for SFM. It wraps the command-line StudioMDL compiler in a simple interface, so you don’t need to memorize terminal commands just to get a model working.
This section walks through getting Crowbar set up, picking the right compiler, and actually running your compile. Each step is quick once you’ve done it a few times, but getting the setup right the first time saves a lot of confusion later.
Read More: Jalynn Elordi: Biography, Family, Career, Age & Net Worth
Installing and Setting Up Crowbar
Download Crowbar and install it like any other application. On first launch, you’ll need to point it toward your Source game directory and your compiler executable. This is also where you’ll configure paths for SFM specifically, since it counts as its own Source game directory.
Take a few minutes here. A wrong path now causes a “StudioMDL not found” error later, which is one of the most common problems new users run into.
Selecting the Correct StudioMDL and Game Configuration
This step trips up a lot of people. You need the StudioMDL compiler that matches SFM’s engine branch, not a random one from another Source game. Using the wrong compiler can produce files that look fine but don’t actually work correctly once loaded.
Double check your game configuration inside Crowbar before every new project, especially if you also mod for other Source games on the same machine. It’s an easy setting to forget you changed.
Compiling the QC File in Crowbar
Once your setup is correct, compiling is simple. Load your QC file into Crowbar, confirm your game configuration, and click compile. Crowbar will run StudioMDL in the background and show you the output log in real time.
Read that log carefully. If something fails, the error message almost always points to the exact line or file causing the problem. This is the fastest way to troubleshoot SFM models during the compile stage itself.
How to Add a Compiled Model to Source Filmmaker
A successful compile is only half the job. Now you need to add models to Source Filmmaker so the program can actually find them. This step is simpler than compiling, but it still trips people up if the folder structure isn’t right.
Getting this part right means understanding exactly where SFM looks for content, and how to refresh the program so it notices your new files.
Where Compiled Models and Materials Should Go
To install SFM model files correctly, place your compiled MDL and its support files inside the correct models folder, and your VMT and VTF files inside the matching materials folder. Many creators use a separate custom content folder rather than editing SFM’s original files directly, which keeps things clean and easy to back up.
If your paths don’t match what your QC file specified during compiling, SFM simply won’t find the files, even if the compile itself succeeded.
Refreshing and Finding the Model in SFM
After copying your files over, restart SFM or refresh its content browser. Search for your model by name. If it doesn’t show up, don’t jump straight to recompiling. First confirm the files actually exist where you placed them, and that SFM’s search paths include that folder.
A custom model not showing in SFM almost always comes down to a path mismatch rather than a compiling mistake.
How to Fix Common SFM Compile Errors
Every SFM creator runs into errors eventually. The good news is that most model compilation errors fall into a handful of predictable categories. Once you recognize the pattern, fixing them gets much faster.
This section covers the four most common problems people search for, along with what’s actually causing each one.
Why Does My SFM Model Have Purple and Black Textures?
Purple and black textures SFM issues almost always mean a broken material link. Check your VMT file first, then confirm the VTF file it points to actually exists, then double check your $cdmaterials path in your QC file. This is one of the most common SFM missing textures problems, and it’s usually an easy fix once you find the broken link.
Why Does the Model Compile but Not Animate?
An SFM model not animating usually points to a skeleton or weighting problem, not a compiling problem. Check your bone names, your vertex weights, and your $sequence definitions. A model can compile perfectly and still fail to animate if the skeleton data doesn’t match between your mesh and your animation files.
Read More: About Blog WizzyDigital Org: Honest 2026 Guide & Review
Why Does Crowbar Say StudioMDL Cannot Be Found?
A Crowbar StudioMDL error almost always means your configured compiler path is wrong. Go back into Crowbar’s game setup and confirm the executable location. This is far more common than people expect, especially after updating Crowbar or moving game files around.
Missing Materials, Textures, or Model Files
Beyond textures specifically, general missing file errors usually trace back to a typo, a case-sensitivity mismatch, or a folder that simply doesn’t exist yet. Always fix SFM compile errors by reading the exact file name in the error message first, since that tells you precisely what to check.
SFM Model Rigging, Physics, and Animation
Once your basic model works, the next challenge is bringing it to life. SFM rigging, SFM physics, and animation all build on top of your compiled model, adding the depth needed for real character work.
This is where projects get noticeably more complex, but also far more rewarding once everything clicks into place.
Setting Up Bones and Skeletal Rigging
Skeletal rigging starts with a clean bone hierarchy. Every bone needs a clear parent-child relationship, and your mesh needs proper weights applied through skinning. Bad weighting shows up as stretched limbs or collapsing joints, and it can’t be fixed by recompiling alone. You have to go back and fix the source rig.
Adding Physics and Collision Data
SFM physics setup relies on a separate collision mesh, defined through the $collisionmodel command in your QC file. This produces a PHY file alongside your main model. Keep your physics mesh simple. A highly detailed render mesh makes a poor physics mesh, and it can slow down or break collision behavior.
Adding Flexes and Facial Animation
SFM flexes control facial animation through named flex controllers. Build these gradually. Test one or two expressions first, confirm they work correctly in SFM, then add more. This staged approach makes it much easier to spot exactly which flex or rule caused a problem if something breaks.
Advanced SFM Compile Techniques
Once you’ve mastered the basics, a few advanced techniques can save serious time on larger projects. These aren’t necessary for a single prop, but they matter a lot once you’re managing dozens of custom assets.
Batch Compiling Multiple Models
Batch compilation lets you compile many QC files in sequence instead of one at a time. This is a huge time saver for asset packs or large character sets, and it keeps your workflow consistent across every file.
Level of Detail and Custom Physics
LOD, or level of detail, allows a model to swap to simpler versions at a distance, which helps with model optimization. Combined with a well-built physics mesh, this keeps complex scenes running smoothly even with lots of custom content loaded.
Scripting and Compilation Automation
Some creators automate their compiling process using scripts that call StudioMDL directly from the command line. This skips the Crowbar interface entirely for repetitive tasks, which is useful once you have a stable, repeatable pipeline.
Motion Capture and Animation Integration
Bringing mocap data into your animation workflow takes some extra care. The incoming animation data has to match your model’s skeletal hierarchy exactly, or the motion won’t transfer correctly once compiled.
SFM Compile Best Practices for Reliable Results ⭐
Consistency beats speed in this hobby. The creators who compile reliably aren’t necessarily the most advanced, they’re just the most organized. A few solid habits go a long way toward avoiding repeated mistakes.
Building good habits early means every future project goes faster, since you’re not solving the same problems over and over again.
How to Organize a Reusable Compilation Workflow ⭐
Keep a template QC file you can reuse across projects. Stick to the same folder naming pattern every time. A repeatable SFM compilation workflow turns a confusing process into a quick, familiar routine.
How to Test Models Before Finalizing Them ⭐
Always test compiled models in stages. Check the mesh first, then the skeleton, then facial controls, then physics. Catching a problem early is always faster than untangling five stacked issues at the end of a project.
How to Keep Custom Models Compatible Over Time ⭐
Document your exporter settings, your compiler version, and your QC structure for each project. Source tools can behave differently across engine branches, so a personal reference sheet becomes incredibly valuable as your project library grows.
Read More: adstotally.com Review 2026: Is It a Legit Ad Network or a Blog?
SFM Compile vs. Other Source Model Workflows ⭐
SFM compile shares its core tools with other Source games, since StudioMDL and the Source SDK power model compiling across the whole engine family. The compiler doesn’t really care whether the final destination is SFM, Garry’s Mod, or a Source-based game, since the underlying Source Engine model format stays the same.
The real difference lies in the content structure and the SFM usermod setup. SFM handles custom assets through its own directory system, separate from a full game install, which makes it a bit more forgiving for solo creators experimenting with compiled assets outside a full mod project.
FAQs
What Is an SFM Compile?
An SFM compile converts your model source files and QC instructions into compiled Source model files that Source Filmmaker can load and use.
Can I Use Crowbar to Compile Models for Source Filmmaker?
Yes. Crowbar provides a graphical interface for StudioMDL and can compile QC file projects once the correct SFM game and compiler paths are configured.
Why Does My SFM Model Have Purple and Black Textures?
This usually points to a missing or incorrectly linked material. Check the VMT file, the VTF file, and your material directory before recompiling.
Why Does My Custom SFM Character Compile but Not Animate?
Check your skeletal hierarchy, bone names, vertex weights, and animation files. A successful compile doesn’t guarantee working animation data.
Why Does Crowbar Say StudioMDL Cannot Be Found?
Your configured compiler path is likely wrong, or a required game tool is missing. Crowbar needs the correct game’s StudioMDL executable to compile anything.
Conclusion
Mastering SFM compile turns custom modeling from guesswork into a repeatable skill. The pipeline stays the same every time: prepare your files, export them correctly, write a clean QC file, compile through Crowbar and StudioMDL, then test the result inside Source Filmmaker.
Every part of this process depends on the part before it. Meshes need correct skeletons, materials need correct paths, and QC commands need to match your compiler branch. Once you build that foundation, you’re ready to create custom characters, props, and full animated scenes with real confidence.